Friday, January 29, 2010

Week 38!

My first week on maternity leave has been an interesting week. I have cleaned my house, caught up with some friends and worked on some projects (like my vegetable garden) that I've been wanting to for ages.

While it has been quite a productive week, I'm left asking "What next?". I do have some projects left on my list to complete, but failing that I am left with nothing to do. I have asked some friends what they do to fill in their days and they tend to watch TV or surf the web, neither of which really appeals to me (in fact, I haven't turned on the TV at all during the day in the past week!). Guess I'll have to think up some more projects.

Anyway, I know I should be grateful for this nice and quiet time as once the baby arrives I am pretty sure my time will no longer be my own lol!

Here is a picture from us taken this morning:


According to the midwife I saw yesterday the baby is in the right position and is engaged, but she doesn't think we will be meeting him/her within the next week which is fine by me. I'm not really in any hurry for the baby to arrive and know that it will come out whenever it wants to, regardless of if I try to hurry it along!
Thursday, January 28, 2010

From little things, big things grow...

I used to be afraid of failure. So afraid, in fact, that I wouldn't even try new things in case it didn't yield the perfect results I was after. Over time I have come to realise that failures actually have a place in everyone's life, whether that be to teach us that we can't be perfect all of the time or to enable us to grow both emotionally and mentally.

Today, I tackled a project where the result is well and truly out of my hands and which has the potential to fail dismally - I planted my vegetable seeds!


The old traditional, non hybrid, open pollinated seeds I ordered from Eden Seeds last week arrived in the mail on Monday. I used their planting guide to determine which seeds out of the ones I purchased I could plant straight away and which would have to wait until other times throughout the year. Today I was able to plant the carrot, lettuce, beetroot, pea, onion and broccoletti seeds.

After doing some research on how to grow seeds I learned that I could use old egg cartons to plant my seeds in rather than fancy seed pots, so this saved us a little bit of money. Basically the seeds can be grown in each pocket of the egg carton and when they have grown enough to be transferred to the raised vegetable garden beds, the pockets are simply cut apart and planted straight into the soil. Watering the seeds in the egg carton prior to them being transferred weakens the structural integrity of the cardboard in the egg carton, so it will break down rather easily once planted - Nifty hey!

In order to plant seeds, you will need a bag of seed raising potting mix. I just used the Yates variety which was about $7 for a bag that will last me quite a while! Once the egg cartons were filled with the mix, I used the end of a pencil to make a hole in each of the pockets at the depth indicated on the back of the individual seed packets. I then popped a couple of seeds into each hole, covered the hole up and gave them a good water.

I plan on bringing my seeds out each morning and placing them in a nice sunny spot on our deck for the day, before popping them in the shed overnight to protect them. As such, I have placed the egg cartons on trays to enable me to move them easily. Here is a picture of my seeds,.complete with little 'seed flags' on the deck this afternoon:

I will keep you up to date with the progress of the seeds and hopefully we will be seeing some sprouts within a week or two!

Wednesday, January 27, 2010

Recipe : Yo Yo's

Tomorrow I am having afternoon tea with two of my very good friends - I can't wait! Of course, this meant that I needed to bake a treat to take along with me so I decided on yo-yo's for the simple fact that they are easy to make and taste great!

Now, I am still on the hunt for the 'perfect' yo-yo recipe (if you think you have one, please let me know!) but so far this one has become a favourite at our Thursday craft night. Here is the recipe below:

You will need:
3/4 cups (190gms) butter
1/3 cup of icing sugar
1 cup of custard powder
1 cup of plain flour
1/2 tspn vanilla essence

Method:
  1. Preheat the oven to 180 degrees.
  2. Cream the butter and icing sugar together.
  3. Add the remaining ingredients and continue to beat until the mixture turns from crumbs into more of a thick batter.
  4. Roll pieces of the mixture into balls, place on a tray lined with baking paper and flatten with a fork.
  5. Bake for 15 - 20 minutes or until lightly golden.
  6. Once cooled, join two biscuits together with icing (I like to put a dash of lemon in my icing too!)
Tip: Did you know that you can freeze left over icing? This is great if, like me, you have trouble getting the consistency of your icing right and end up with too much. Just place the icing in an air tight container and freeze until you need it again. It doesn't take too long to thaw out either.

Here is a picture of my biscuits all ready for afternoon tea tomorrow!


Yum! I just need to try not to eat too many now!

Monday, January 25, 2010

Project #2 - Christmas Traditions Book (Update #2)

Remember waaaay back in September, when I blogged about my Christmas Traditions book? Well, it's still not finished but I have been working on it!

I was originally planning on using 90 gsm linen bond paper for the pages, but was concerned that it wouldn't be thick enough to stand the test of time. As such I bought a pack of 220gsm paper
with a nice metallic sheen to it and I am really happy with the quality and texture of the paper. Anyway enough jibber-jabba about the paper, let me show you some of the pages from the recipe section.

Here is the recipe cards for the Chocolate Candy Cake Cookies (hmmmm they are SOOO good!) and the shortbread:

And here are the recipe cards for the Reindeer biscuits and the gingerbread men:

I'm not sure if you can see or not, but the writing on the cards is really quite fancy so each card takes roughly 30 - 45 minutes to write out (with carpal tunnel and tendinitis lol).

I still need to finish the Christmas CD section and the pages listing the ornaments given each year as a tradition, but they are well under way. I have decided that the section dedicated to listing our family traditions will be left blank at this point as they may very well change over the coming Christmas or two, when we establish new ones with our baby.

Oh and before I depart, let me remind you all that it is apparently only 333 days until Christmas - Scary thought, hey!

Friday, January 22, 2010

Week 37!

It is hard to believe that at 37 weeks I am considered 'full term'. It seems like a life time ago that I held the positive pregnancy test in my hand and broke the news to Matty that we would soon be having a baby!

Now, in a matter of weeks, that baby will be here and life as we know it will change forever...and I can't wait!


Here is a picture of us from this morning:

Today is my last day at work for 12 months and I am pretty excited about that as well. Check out this cake that my friend's mum made for my farewell morning tea today!

Insanely awesome, hey!

I am not really sure how I am going to fill in the weeks up until I have our baby, but I am thinking it will involve craft, baking and a LOT of sleeping!

Thursday, January 21, 2010

Recipe : Cheat's Rocky Road Recipe

Let me share with you this recipe for the easiest rocky road you will ever make. The whole thing can be made in less than 10 minutes and it tastes YUM!
You will need:
3 or 4 packets of your favourite lollies (In this version I have used lolly banana's, fruit sticks, mini marshmallows and turkish delight) 750gms of milk chocolate

Method:
Break the milk chocolate into squares and place in a heatproof bowl over a water bath to melt. Make sure you remember to stir it regularly while completing the remaining steps, to ensure the chocolate doesn't burn.

Line a 18cm x 27cm (or similar sized) slice tray with baking paper. Chop your lollies up into smallish pieces and place half of the lollies in the bottom of the tray. It will look like you have WAY too many lollies, but just remember, you can NEVER have too many lollies!


Once the chocolate is melted, pour half of it into the tray with the lollies and give it a little stir around, then place your remaining lollies on top:

Top the tray up with the remaining chocolate and poke around a little with a wooden spoon until all of the lollies are covered in chocolate:

Place in the refrigerator and allow to set. Once set you will need to cut into bite sized pieces. If the pieces are too big it becomes too hard to eat, so make sure they are of a manageable size.

Hmmmm chocolatey goodness!

Wednesday, January 20, 2010

A new long-term project!

So what do you do when the project you've been working on for the past 8 months is finally finished? Well, you start something brand spanking new of course!

For a while now I have become increasingly frustrated at the price of fruit and vegetables. It really irks me that we, as consumers, seem to pay more and more for these products while the quality of them declines. I have been reading about the idea of self sufficiency for a while now, but lets face it - it takes dedication and determination to make a family fully self sufficient and I am not sure I have enough of either of those things at this point in time.

While self sufficiency seems out of my reach at the moment, it doesn't mean that I can't take small steps to work towards the goal. While I was holidaying in Murray Bridge over the Christmas period I read a book called 'Choosing Eden'. This book tells the story of a couple in their 50's who moved to outer New South Wales to begin a life of self sufficiency to ensure that their family would have a refuge in the event of a Peak Oil crisis.

I am not going to delve too much into Peak Oil here (because it's pretty scary stuff), but basically it is believed that at some point the World's oil resources will be depleted and as a result the 300,000 every day items that rely on oil to be produced, will either not be available or will cost too much for every day people to be able to afford, so life as we know it will change dramatically. I told you it was scary!

So, today our journey into small-scale self sufficiency begins with the setting up of a vegetable garden! Here is a picture of the plot I will be using to grow our vegetables - erk...it's horrible hey!

The soil around our house is TERRIBLE. In fact, you can't even call it 'soil' because it's not. It's clay. Copious amounts of clay. But that isn't going to deter me. See those two wooden boxes on the top level of the retaining wall? Well that's where we are going to do our vegetable planting.

The boxes were made by my dad out of reclaimed packing crates, so they were FREE (rather than the $60 each Bunnings were asking!). They are roughly 1 mtr in length and about 80 cms wide, which is just perfect for our family of two, soon to be three!

The next step in setting up the vegetable garden is to fill the crates with suitable material to grow the vegetables in and order the seeds. It took me quite a bit of reading to understand the best way to make a raised vegetable garden, so I am going to blog the process for you so that you too can join in the journey of small-scale self sufficiency! Stay tuned for more!

Tuesday, January 19, 2010

The Nursery is Finished!

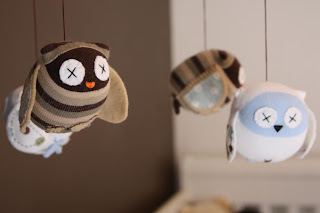
What do you get when you combine a cot quilt, nursery curtains, an owl mobile, a cot valance, two sets of bunting flags, a lamp covered with fabric, a seat topper and a cushion cover for a rocking chair? Well, you get a finished nursery!

One thing that I did before I started up my blog was paint a tree on the wall and fill it with leaves and owls, so while you may have seen everything else in the nursery, a lot of you may not have seen this:

It took quite a while as I painted the tree onto the wall with the aid of a data projector, and then cut the owls and leaves out using cardstock. I think the overall result was quite good! Here is a close up picture of the owls in the tree:

And just for good measure, here is another picture of my favourite thing in the nursery:

It is strange, because I thought that I would feel slightly relieved that I could class the nursery as finished. Instead, I have spent a lot of time in there wondering what else I could do!! I am hoping that the feeling will pass so that I can get stuck into some non-baby related projects.... and I have a lot of those!

Project #27 - Toy Box Seat Topper (finished)

Last week I purchased a toy box off eBay for the nursery. It arrived flat-packed and after a bit of perseverance I was able to put it together myself!


I knew as soon as I saw it on eBay that I would need to put a seat topper on it as it would be too stark in the nursery. I already had a good idea as to how it would look as I wanted to tie it in with the Rocking Chair cushion cover I made from the fairy tale fabric last week. The cover opens up from the back, so it can be taken off for washing when it gets dirty! Here is a picture of how it turned out:

The use of the brown fabric tied in nicely with the room's feature wall once it was on top of the toybox and in it's own special little spot in the nursery:

While the general concept of the seat topper wasn't too difficult, I really struggled with sewing in the end pieces of fabric. I ended up sewing the whole thing (except the ends) together and then putting the cover onto the piece of foam and pinning the ends in before sewing them. I am pretty sure there would be an easier way to do it, but I struggled to find it!

The most exciting thing about this seat topper, is that it was the LAST thing to do before the nursery was considered finished! You can see photos of the finished nursery here.

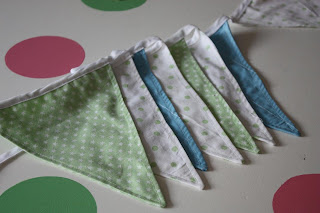
Project #39 - Miniature Bunting Flags for Window (Finished)

You may remember that a couple of weeks ago I made a set of bunting flags to hang along the chocolate brown wall in the nursery. I had so much fun doing them that I decided to make a miniature set to spruce up our incredibly boring window.

These were made in the same way as the other bunting flags, with two layers of fabric sewn together, turned in the right way and then sewn along the outer edge before being wedged in between a folded over piece of bias binding and sewn in place.

The best thing about bunting flags is that you think they are going to look terrible when you are pinning them together, but somehow sewing them together makes all the world of difference!

If you are going to attempt making bunting flags yourself, I strongly recommend you make a template out of a piece of cardboard so that the flags are as uniform as they can be. Don't forget to leave a piece of bias binding (around 25 centimetres long) at each end so that you can tie it into a bow and fix the flags to whatever object you need to.

The flags in the picture above are actually three separate strands, so that they can be used elsewhere if need be.

So simple, yet effective. If only one could make their first million through the sales of bunting flags - I would be up for that!

Monday, January 18, 2010

Project #38 - Cover for Change Table Mat (finished)

I am a little behind in blogging about the items I've made this week for the simple fact that I have been churning them out quicker than you can imagine! Setting the goal of finishing the nursery before I finish work on the 22nd of January was definitely a great idea and inspired me to get my bum into gear. I actually think (fingers crossed) that the nursery will be finished tomorrow (yikes!).

One of the problems we had in our nursery was the change table mat. It is just a standard, run of the mill change table mat but as you may or may not know, they are all covered in a horrid waterproofing plastic. While I agree that it is necessary the thought of having a hot, sweaty baby on it in the summer made me want to make a cover for it. I wouldn't want to lay on it when I was hot and sweaty so why should I expect our baby to!

My original plan was to make a cover in the exact same size of the mat so that all faces of the mat would be covered. I was discussing alternate ideas with my friend Kelly and we decided I would actually be better off making it a simple rectangle so that it would be easier to iron once it is washed. As such, I made a simple rectangular cover that ties up with bias binding at the back to hold it in place. Here is a picture of it finished:

Before you start screaming obscenities at me about how silly I am for making it white, as it will no doubt get poo on it and then it will be ruined, take heart that I did take this into consideration. As such I made these too:

Are you wondering what they are? Well I am calling them 'bum bits'. They are rectangular pieces of fabric backed with flannalette that are designed to sit over the top of the change table mat in the place where the baby's bum goes, like this:

Problem solved and yet another project to mark as completed!

Project #8 - Cot Quilt (Finished)

I can't believe it! The cot quilt is finally finished and even though it didn't quite go the way I thought it would, I am happy with the end result:

The design turned out exactly like it was supposed to but my plans for using an old, unused quilt for the middle didn't work so well. Luckily my mother in law, who does a fair bit of quilting, came up on the weekend and was able to help me think of other ways to do it.

Basically the problem I had was that when the 'quilt sandwich' was put together it was too thick for the sewing machine, which essentially made the stitches uneven when I sewed (even when I used a walking foot).

The solution we came up with,which actually worked out better anyway, was to quilt the front with a layer of Pellon behind it and then make the whole thing into a quilt cover which could then be stuffed with the reclaimed quilt.

The upside of finishing the quilt this way, is that it can be used as both a summer and winter quilt by pulling the middle insert out during the summer months and stuffing it back in for the winter.

The finished quilt looks like this once it is in the cot:

I did learn a lot about myself doing this project, like the fact that I don't think I will be taking up quilting as a hobby any time soon! The one good thing to come out of this project, however, is that I noticed a dramatic improvement in my sewing skills compared to when I first started the blog. I think that my skills would definitely be in the 'intermediate' range now and that gives me inspiration to perhaps try some more difficult sewing projects!

Here are the links to the other posts on the cot quilt:

Friday, January 15, 2010

Week 36!

It is almost as though everyone expects that by the time you hit the 35-36 week mark you'll be well and truly 'over' being pregnant. People don't seem to be able to pass you in the hall at work without saying "How are you feeeeeling?" in a sad, depressed voice, almost like they feel sorry for you!

Every second person seems to want to ask how your back and feet are holding up and then there are those that seem to think it is acceptable to ask how much weight you've put on... Ummmm... how much weight have YOU put on? Looks like someone ate a little bit too much turkey at Christmas time!

I may be singing a different tune next week, but at this point (apart from the hand problem I have going on) I feel pretty damn good. Here is a picture of us from this morning:

Yesterday I had an appointment with the obstetrician and the baby is measuring at 32 -33 weeks. Normally I would have gotten worried, flipped out and ordered to have another growth scan, but the fact of the matter is that I've been under in measurement the whole pregnancy and every other scan has shown that our baby is quite healthy and happy. So I am not going to let some crazy measurement upset me.

I had the GBS swab done yesterday so just waiting for the results on that now. I'm hoping it comes back negative so I don't need to go into hospital as soon as my waters break, but if it does come back positive then there isn't much I can do about it.

Well, must away. The toy box just arrived in the mail and I am busting to put it together!

Thursday, January 14, 2010

Project #8 - Cot Quilt (Update #3)

Last night I was thinking about the cot quilt and decided it was time to 'man-up' and show you what I have so far. So, here it is all pinned together ready for my attempt at machine quilting:

See that little owl in the bottom left hand corner with the worried look on his face? He doesn't usually look like that, I swear. I think he's just cr@pping himself about the prospect of me ruining him with my lack of machine quilting ability!

Rest assured little owl, I will be doing my research before launching into the machining. Luckily there are a number of 'quilting for dummies' websites that really do dumb-down the whole process to a level a novice, like me, can understand.

To tell you the truth, I am actually not too worried about the machine quilting. What I am worried about it whether the machine will be able to handle the thickness of the quilt, as I decided to use an old double bed quilt we had lying around rather than buying special wadding. As the quilt is quite good quality it is relatively thick, so I am hoping that the machine will be able to handle it. I guess time will tell!

Wednesday, January 13, 2010

Project #40 - Cushion for Rocking Chair (finished)

When I was in the quilting shop at Murray Bridge over Christmas, I came across this fabric in the clearance section of the fat quarters:

It is almost 'calico-like' fabric with words from fairy tales printed on it. I was looking for something similar a couple of months back to make some wall hangings, but (of course) I couldn't find anything remotely like it at the time.

Needless to say, I pressed on with designing the nursery and as a result the wall hangings are no longer required. I bought the fabric anyway and put it in my stash figuring it would come in handy at some point.

Well tonight I was thinking that I really should start the cushion cover for the rocking chair. My plan was to make the cushion cover to match the cot quilt, but then I had an absolutely BRILLIANT idea...

Since the rocking chair was purchased for the sole purpose of being where I sit to read to our children, why not make the cushion cover out of the fairy tale material!?

As the cushion size was 55cm x 55cm and my piece of fabric was a little bit smaller at 55cm x 52cm, I decided to put a border around the cushion - kind of like you would see on a Euro pillow. The whole thing came together quite easily, with the opening resembling that of a pillowcase. Here is a picture of the finished cushion:

I am now thinking that I might make the seat topper for the toy box out of the same material, since we are hoping to have a lot of toys that encourage imaginative play and that is what fairy tales are all about - imagination!

Tuesday, January 12, 2010

Project #8 - Cot Quilt (Update #2)

I have been plodding away on the cot quilt for the last week and I am now ready to admit that it is actually beginning to take on the form of a quilt. Having said that however, I am still not ready to reveal it all in it's glory. Here is another sneak peak at it though:

Given the problems I have been having with my hands, I am incredibly glad that I decided to machine applique it instead of hand stitching it, or else I don't think it would be anywhere near finished. I still have a fair bit of work to do on it but am hoping that I will get the bulk done over the next couple of days while it is a little bit cooler (especially since I'm hand stitching the binding on).

Today I am going to go and get the backing fabric and try machine quilting the layers together. This is possibly the part that I am most frightened about attempting as it could potentially ruin the whole quilt if I muck it up. Wish me luck!

Here is a link to the other post on the cot quilt:

Monday, January 11, 2010

Project #37 - Lamp for the Nursery (finished)

I am on a nursery blitz! Ideally, I would like to finish the nursery before I finish up work on the 22nd of January. In order for that to happen I need to (as a minimum) do the following:
  • Finish the cot quilt;
  • Make a picture for the wall;
  • Sew the mini bunting flags;
  • Make a foam cushion cover for the toy box;
  • Sew a cushion for the rocking chair;
  • Make a cover for the change table mat; and
  • Cover the lamp I bought with fabric
I had been procrastinating about covering the lamp with fabric for a couple of days, unsure whether the instructions on the internet would really work, when I finally plucked up enough courage to try it.

Here is a picture of the lamp as I bought it from Bunnings:


Now there is nothing wrong with this lamp the way it is, in fact, it is quite nice. It just lacks a little 'pizazz', hence why I wanted to cover it with fabric.

The instructions I followed are here but there are a fair few tips that could have been included in the steps to make the endeavor more successful. These tips are as follows:
  1. Iron your fabric first. Common sense tells you that if you put un-ironed fabric onto your lamp, it's going to look crinkly.
  2. Cover the base of your lamp with a plastic bag to avoid any adhesive getting on it.
  3. Spraying your fabric with starch prior to ironing will make it a little bit stiffer, so it will be easier to work with.
  4. Spray adhesive really is not strong enough to hold the fabric to the lamp. It is suitable to 'tack' it to the lamp, but I question it's long term durability as the main adhesive used. I used spray adhesive, and then painted a clear drying craft glue over where the fabrics joined. I also opted to 'hot glue gun' the extra inch of fabric to the inside edges as I questioned that their 'bulldog clip' method would hold well enough. The use of these extra adhesives appear to hold the fabric on quite firmly.
  5. I found that the outside looked like it had been finished, but the inside edges where you glue the extra inch of fabric to the top and bottom of the inside of the lamp looked a bit unpolished. Therefore, I opted to glue my ribbon along those edges rather than on the outside. This is particularly useful if you plan on having your lamp up on a shelf (like us) as you don't want people thinking that your lamp looks great until they get up closer and can see the inside edges look tacky!
Anyway, here is a picture of the finished lamp on the new floating shelves Matty put up yesterday (oooh how I love floating shelves!).

Well that's one step closer to finishing the nursery. What to next, that is the question!

Friday, January 8, 2010

Week 35!

Well with five weeks to go we are on the home stretch and I am seriously wondering where the time has gone! I can’t say that I am sick of being pregnant yet (because I am not), but I am sick of the ongoing problems with my hands….

Due to excessive fluid retention I developed Carpal Tunnel Syndrome which resulted in having to wear splints of a night. Those splints, however, have caused tenosynovitis in both wrists and to put it mildly – it hurts like hell!

The upside of this problem is that I don’t seem to notice a lot of the ailments that other pregnant women seem to complain about, so maybe it is a blessing in disguise! Anyway, here is the picture of us from this morning:

Matty and I celebrated our 4th wedding anniversary this week too. In a world where so many marriages end in divorce or with both parties fighting on a daily basis, we believe it is important to celebrate each year so that we can be reminded of what a wonderful marriage and life we have made for ourselves.

The highlight of my day was not the digital photo frame that Matty gave me as a gift, but the card that came along with it. Forgetting to buy one he had set about making one himself and although the design was flawed (it was heart-shaped so didn'’t stand up) the fact that he went to the trouble of making me a card at all, just reminded me more why I love him so much.

Here is a picture of us on our wedding day a whole 4 years ago:

Awww isn't that sweet lol!

Wednesday, January 6, 2010

Project #8 - Cot Quilt

I have been needing to make a cot quilt for quite some time, but having never quilted before (and having a number of 'quilting professionals' in the family) I found the task a little overwhelming. The only thing that spurred me on to actually start it was the fact that I could only find one cot quilt that I thought was 'ok' and it retailed for over $165!

Our recent trip to Murray Bridge was supposed to be a good time to really get it all underway, but I just found that I procrastinated even more (although I did find a couple of great fabrics to use and finalise my design). It wasn't until I got back home and machine appliqued some of my design on to the backing material, that I started to feel like it was coming together a little.

Now it wouldn't be much fun if I just showed you the full design before it is all put together, but here is a snippet of part of the quilt just so you can get a feel for what it 'might' look like:

I was originally going to hand stitch the whole design onto the backing material, but am glad that I decided to machine applique it instead as it really wasn't as hard as I had envisaged. I simply set my sewing machine to a tight zig-zag and whipped around each of the shapes and it was done!

I still have a little bit of appliqueing to do and then I just need to put it all together. Fingers crossed it actually looks ok once it's finished!


Here is a link to the other post on the cot quilt:

Tuesday, January 5, 2010

Project #12 - Nursery Curtains (Finished)

Have you SEEN the price of curtains these days? Simply put... the cost is absolutely LUDICROUS! I should have remembered this from the time I wanted to put roman blinds on three of our windows (all small) and it was going to cost around $450. Needless to say, I found a tutorial on the web and managed to make all three for under $50.

Anyway, a couple of weeks back I thought I should get onto making some curtains for the nursery (and probably the other two bedrooms too) so off I trundled to spotlight. I knew I wanted sail top curtains (the ones with the oversized eyelets) and I also knew that I wanted them to serve one main purpose - to block out some light.

I managed to find some that I liked for $99 that met both of the above criteria. To make things even more appealing I had a 'spend $100, save $40' voucher so I figured I might as well get them all and save a little bit of money too.

I picked up three packets (one for each room) and calculated that it would cost me around the $260 mark (and yes, I realise I could have asked two of my friends to go in with their voucher and buy a pack each to save more money).

Anyway, on my way to
the register I was reading the package, when I realised that there was only ONE curtain in each pack! ONE curtain for $99 - RIDICULOUS! Not only that, but who in their right mind would only want to purchase half of a curtain set *sigh*.... back to the drawing board.

By then I had decided that $300 was the maximum I was willing to pay for all three sets of curtains and that I would keep my eyes open for curtains on sale. It didn't take long. In the very next Spotlight catalogue they had Magic Drape material reduced from $34.95 a metre to $24.95 a metre. I calculated that the 9 metres I needed would come to around the $225 mark, which was perfect! Sure, I had to make them myself but it was under half the price of the other curtains.

When I took the Magic Drape fabric to the counter the lady advised that there were a couple of dirty marks on the outside of the fabric which were likely caused during transportation, but that they should come out when rubbed over with a damp cloth. I had a look and sure enough it looked like they would come out easily, but why should I have to pay for the extra work that would take? I told her I would buy the fabric, but only if she could discount it further.

I was expecting her to discount the first metre (if anything at all), but she advised she would drop the price of the first 6 metres to $19.95 and then charge me the sale price of $24.95 for the remaining 3 metres. That resulted in the total cost being closer to $195 - a saving of $405 on what the other curtains would have cost me!

Anyway to cut a really long story short I sewed the nursery curtains this afternoon, ironed them and then hung them and this is how they turned out:

At the moment they are a little plain, but I am making a set of small bunting flags for this window too which I think will add a nice splash of colour to the window. We are also going to hang some sheer curtains as well to soften the light in the room. Hopefully it should be all done by the weekend!

Monday, January 4, 2010

Project #36 - Bunting Flags (Finished)

Our nursery is painted white with one chocolate brown feature wall. It was like that when we bought the house and the other two bedrooms also share the same coloured feature wall. It ties in nicely with our owl theme but I was worried that the room would be a little drab, so I decided to make a set of bunting flags to go across the top of the feature wall.

If I had have known how much fun they are to make, I would have made them sooner! I scoured the net and found that there were multiple ways in which a set of bunting flags could be made. You can either have them single or double layered, sewn or not sewn around the edges and the size and shape of each flag is really up to you!

I decided that since our bunting flags were going on the chocolate brown wall that they should be double thickness (so the brown didn't show through on the white flags) and as I like things to look finished, I decided the edges should be sewn. Here is a picture of the flags hanging up in our nursery - right above the 'dream' sign that my step mum surprised us with a couple of weeks back!

All up I think the flags took me about an hour to make. I am so impressed with how they turned out and the instant 'lift' they gave the room, that I have decided to make a smaller set to go across the window.

Friday, January 1, 2010

Weeks 33 and 34!

Well I am back from spending time in Murray Bridge with Matty's family and I must say, I am feeling very well rested!

Christmas day was filled with fun and laughter and a LOT of food shared with those we love and also happened to fall on the 33 week mark, so here is a picture of me on Christmas morning:

Darth decided to put on a show and double in size while we were there, with everyone thinking that it was quite possible I could explode. Within two days of being back in Victoria, I am pleased to report that he/she has decided to return to a more 'manageable' size lol. Here is a picture we took this morning to mark 34 weeks:

I must say that I am excited about what 2010 holds for us especially in the month of February, which will see us celebrating the following:
  • My Nana's 70th birthday;
  • Matty's Pa's 90th birthday;
  • My Aunties 40th birthday;
  • My Pa's 80th birthday;
  • My Brother's 18th birthday;
  • My Nana and Pa's 60th Wedding anniversary;
  • My 30th birthday; and
  • The arrival of our first child.
Gosh, I am feeling tired just reading that list!

I am also pretty excited about the challenges that we will face as a family in 2010 - Learning to care for a child, trying to maintain a healthy relationship and learning to save money while on one wage! It is certainly going to be a big year for us and I look forward to sharing our ups and downs with you all!